

Eery Halloween Lanterns
Halloween time is probably my favorite time of the year. The humidity goes down, pumpkins are abound and costumes are being created. The request to decorate comes earlier and earlier the older my little one gets, (which I find fantastic!). We don’t really have seasons in South Florida, so decorating helps make it feel like the time is not standing still. Every Halloween we invite my mom and her beau over for a themed Halloween dinner while we wait for the trick or treaters. I plan to post some recipes from our traditional Halloween meals very soon.
This year I have made the effort to go beyond the fun, ready-made decorations from the craft store, and create a few of my own tabletop designs with my Cricut Maker. This first project was an experiment in eery mood lighting for my table setting. I have seen these paper lanterns before, but never actually executed any for my Halloween table.

This year I have made the effort to go beyond the fun, ready made decorations from the craft store or Target, and create a few of my own table top designs with my Cricut Maker.
For this Halloween craft, I drew up a design in Adobe Illustrator, and got to work figuring out how to cut and score such an intricate drawing. I was really putting that little Maker to the test. After a few tries, I was able to edit the design to cut beautifully, but also maintain the details that really make this lantern pop.
Now, fair warning, you must have a delicate touch to remove the cardstock design from the cutting mat. See below to view the easiest approach I found to remove the cut, and not tear the spider’s tiny details.

Here are the items and tools I used in order to make this Halloween lantern craft.
CRICUT TOOLS:
Standard Cricut Mat Premium Fine Point Blade
Cricut score tool 01
Cricut Scraper
Eery Halloween Lantern SVG. file
OTHER SUPPLIES:
12x12 black (or any dark color), Medium Weight Cardstock
4 pieces of 3.75 wide by 5.25 high, Cut Vellum (color of your choosing)
Exacto Knife
Glue Stick
Battery Powered LED Tea Light
Kitten Helper (if available)

If you cardstock has any texture, be sure to place the cardstock texture side face down on your mat for an easier, precise cut.
1) Upload the Eery Lantern SVG. to the Cricut Design Space and follow the directions to assign the scoring layers.
2) Place your 12x12 cardstock on your cutting mat and apply the proper material settings in the Cricut software, then make your cut.
3) Once the pattern is scored and cut, carefully remove the outside edges from the pattern by carefully sliding the Exacto blade under the edge of the card stock to lift it from the mat. Set the knife in a safe place, away from your workspace. Continue lifting the paper with your hands until the outside edge is completely removed from your mat.

Carefully using an Exacto blade, gently lift a corner of the paper, then pull back the outside edges with your hands. Save the wide portion of the leftover paper for a future project. (Stay tuned for Flying Bat Napkin Rings!)
4) Next, grab your Exacto and slide it under the corner of the lantern on the side of the spider. Set the Exacto aside in a safe place, and use your scraper to lift from the bat feature of the spider side, slowly lifting and not tearing the circular section from the lantern.

Very gently, use the scraper tool to separate the paper from the mat. Get familiar with what is the negative space and positive space to better plan for your approach. The ring around the center oval, and the oval with the spider in it, are the toughest areas to lift, but worth it.
5) Once you have separated the spider side of the lantern, grab the paper from the score line edge and slowly lift the remaining side containing the spider’s web. (You will be surprised how easily this section lifts up.)
6) Repeat on the second section of lantern that remains on the mat.
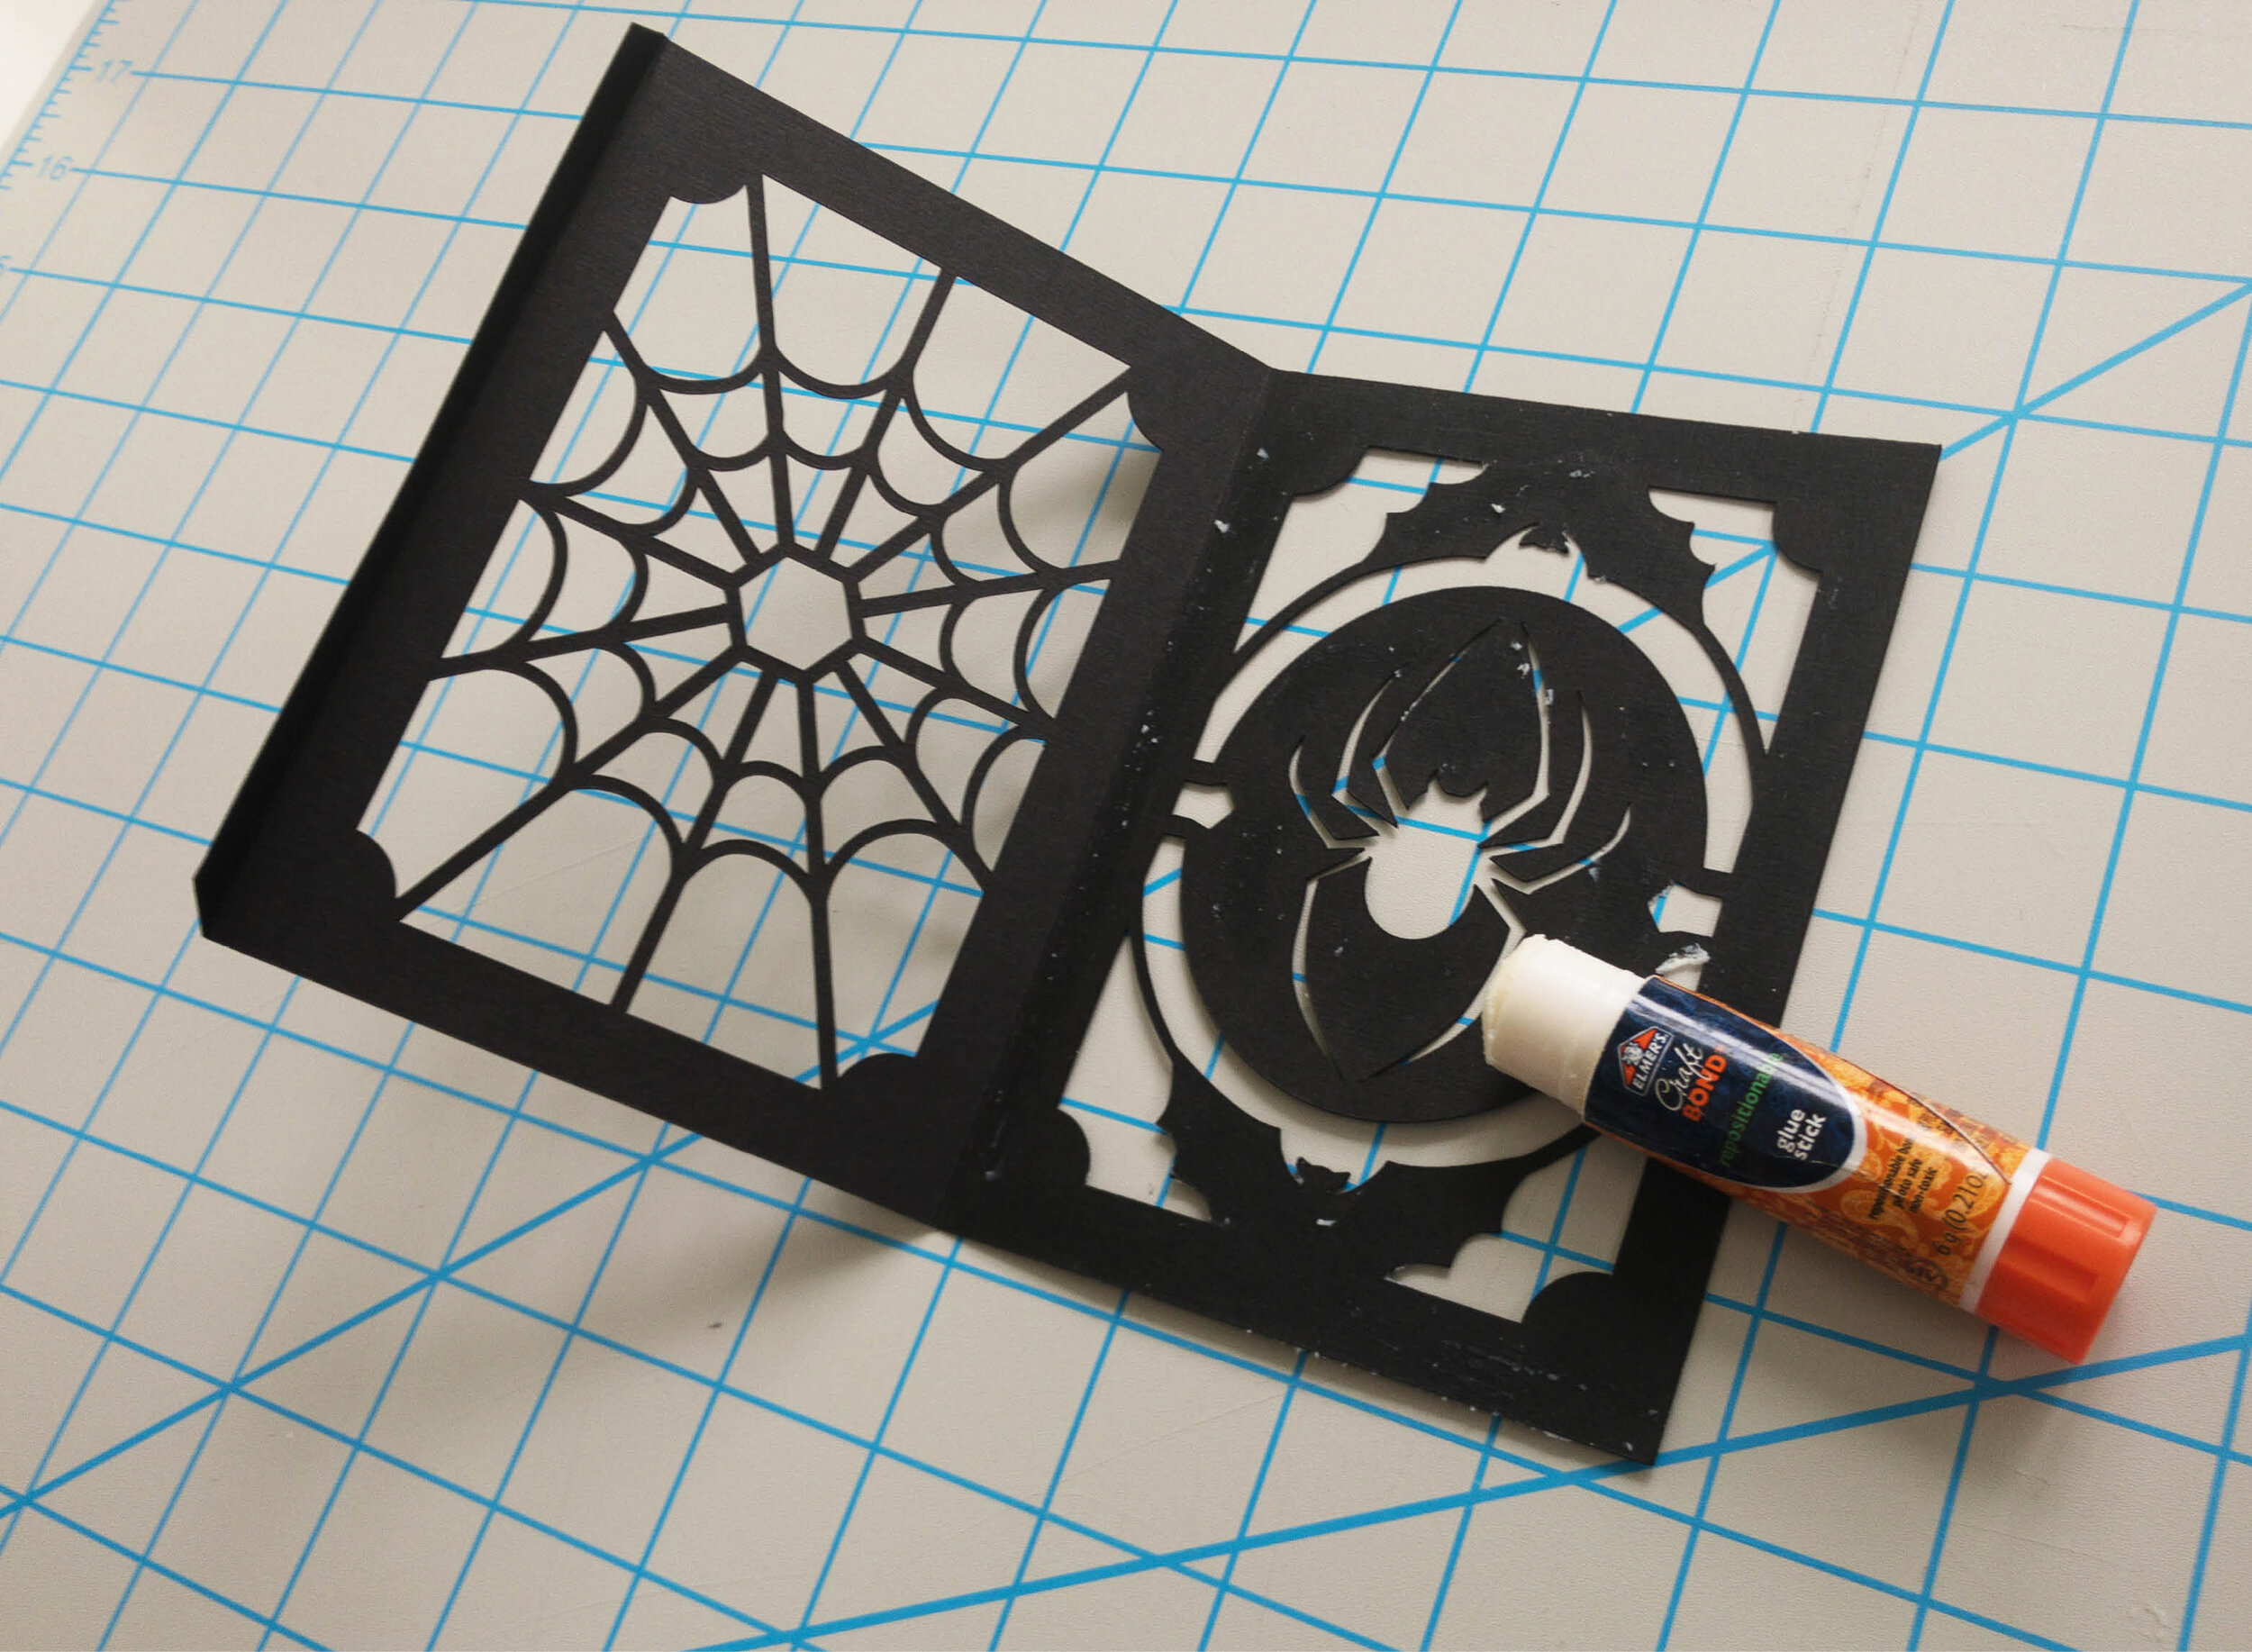
Apply glue to the edges throughly, but don’t fret if you don’t think you can apply it to the center details. As long as the edges are secure, the depth of the center design is actually cooler if you don’t adhere it to the vellum.
7) Once your sections are released from the mat, take your glue stick and apply glue to the edges of each panel, and anywhere where there is enough surface area to apply it. For the web side, don’t worry about applying it to the web itself, focus on the edge surface area.

Be sure to apply glue to both the cardstock and the vellum. It holds better in the end when the glue adheres to itself on both materials. The vellum will appear to wrinkle from the moisture of the glue, but if applied well with the scraper, it will straighten out enough once dry.
8) Prepare your vellum to the dimensions cited above. Apply glue to the edges of the pre-cut vellum pieces, then apply to the panels while the glue is still moist on both the card stock and vellum. Use your scraper to adhere the vellum to the cardstock consistently and to avoid wrinkles.

I cut my vellum pieces by hand using a ruler and an Exacto knife, but I recommend just creating the cut lines to size on the Cricut. Just type them in. Why risk injury? The dimensions are available in the list of items at the top of this post.
9) Once the vellum is applied and dried, fold the panels along the score lines. Apply glue on the outside of the web panel tabs, as well as the inside of each the spider panels, then attach.

If you have a Kitten Helper to distract you, or to lend a paw, now would be the time to call on said helper. WARNING: Kitten Helpers may destroy your craft space, but such hazards are tolerated in the name of cuteness.
10) Once the corners are dry, crease the corner scores once again to make neat 90 degree angles.


11) Add your electric tea light, and enjoy your Eery Halloween Lantern!


