

Surf Party Table Decor
Decorating for kids parties is always a blast! This year, our daughter requested a surf themed party and we were happy to oblige. We drew up some tropical foliage to cut on the Cricut, gathered some scraps of cardboard and got to work on designing themed centerpieces.
After a few practice runs, we found the right combination of colors, sizes and materials which worked out the best. For the custom Surfing’ to 7 center message, we designed, printed and mounted it to foam core, but you can create any paper element for the center that you prefer (more flowers perhaps?).
Check out the video tutorial below to see how we created this one of a kind table centerpiece!


CRICUT TOOLS:
Standard Cricut® Mat
Cricut® Premium Fine Point Blade
PAPER MATERIALS:
12x12” Light Green, Medium/Heavy Weight Cardstock
12x12” Medium Green, Medium/Heavy Weight Cardstock
12x12” Dark Green, Medium/Heavy Weight Cardstock
12x12” Light Pink, Medium/Heavy Weight Cardstock
12x12” Dark Pink, Medium/Heavy Weight Cardstock
OTHER SUPPLIES:
Hot Glue Gun
18 Gauge Floral Stem Wire (cloth covered works best)
Wire Cutters
Exacto Blade
Pin Tool
Cardboard (I used a friend’s new TV box)
Wood Grain Contact Paper
Custom Center Message

1) Start by printing out the base template. This will need to be printed on multiple sheets of letter size paper because of the large dimensions. Once printed, connect the sheets of paper with tape and then cut it out.

2. Place the paper template on your cardboard and trace the edge.

3. Cut along your edge and pop out of the remaining cardboard.

4. Using a pin tool, poke holes through the cardboard where the guide dots are located.

5. Cut a piece of contact paper a bit larger than the size of the cardboard.Remove the backing and place it sticky side up on your cutting mat. Place the cardboard down on the sticky side, then trim the excess off. Flip it over and gently smooth out the contact paper, removing any bubbles or wrinkles. (Contact paper is forgiving, so if you need to lift it off to make adjustments, it will still work.)

6. Once the contact paper is applied, use your pin tool to poke through the contact paper and wiggle it around a bit to open the hole just enough so the wire will fit through.

7. Cut the wire to fit each of the different types of foliage. You want to leave about 1.5” of wire to hang off the edge of the paper to bend under the cardboard and be glued.

8. Hot glue your wire to each piece of greenery and flowers.

9. Poke your greenery through the punctures you created in Step 6, flip over the base and glue the wire to the cardboard, covering with chip board or paper to secure it.
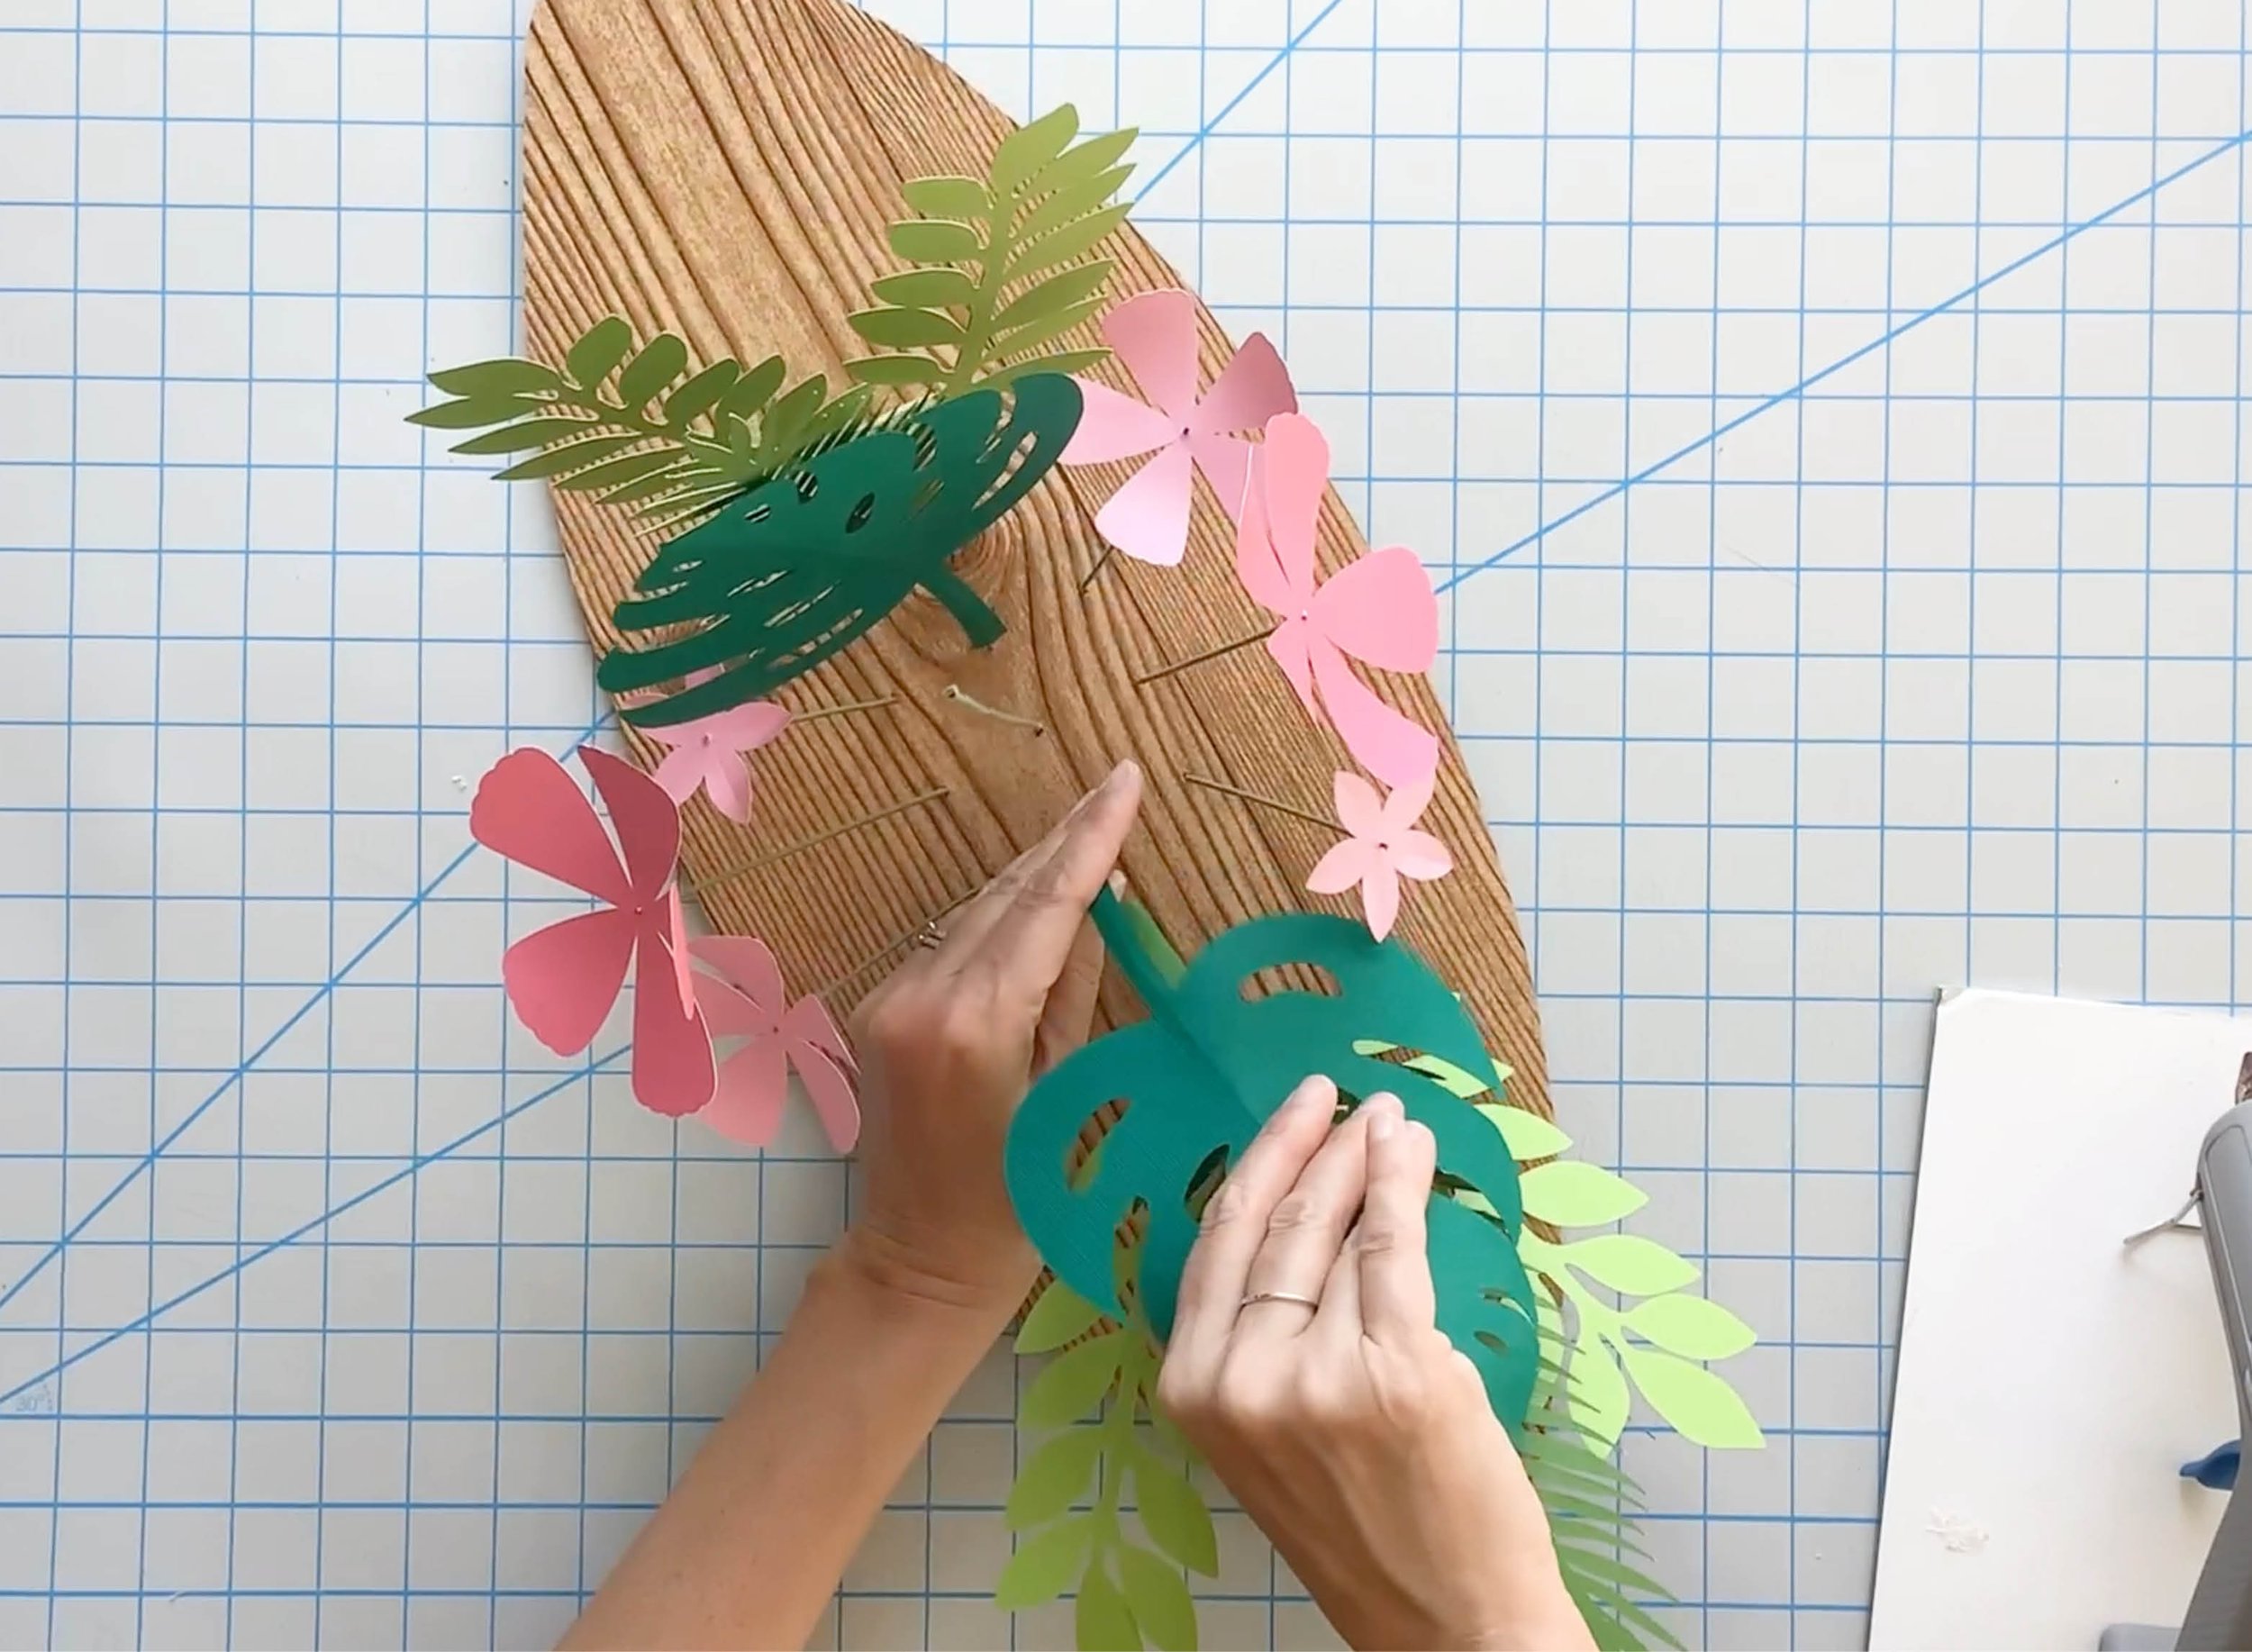
10. Once all of your foliage is glued, bend each piece in slight arches to give it a more natural appearance.

11. Place your custom event element in the center and enjoy!


